So I know I promised you a hen do blog, but with the wedding on Friday I just ran out of time. Now the wedding has been and gone it seems silly to talk about the hen do when I can write about the actual event.
If this was just a blog about the wedding I would only need one word….IMMENSE!
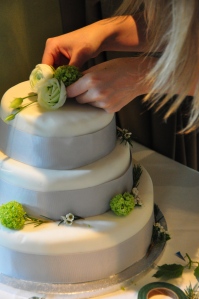
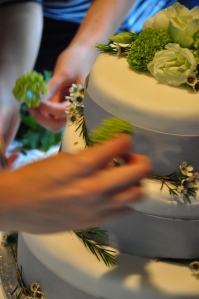
And what is a wedding without the cake. So instead of filling you in on the dresses, speeches and dancing I will update you on part two of wedding cake making .
The last time we checked into wedding cake world we had 3 fruit cakes all made being fed on a weekly basis. ( and when I say fed I mean pouring spoonful of Grand Marnier over them once a week, not that they have some how grown mouths and needed there five a day)
Just leaving almond icing, white icing, transporting, stacking and decorating. Nothing really!
So I decided to make it more challenging… cue broken finger!
Yep you read that right, on my birthday of all days I managed to break my middle finger on my left hand. Happy Birthday! You might be thinking ‘ oh the left hand, thats fine’ well you would be wrong. It turns out your left hand middle finger is quite a useful apparatus. Especially when icing a 12inch cake.
But what is wedding cake icing without a bit of a challenge.
So here is ‘ How to ice a wedding cake From Scratch’ (with a broken finger … please note if you don’t have broken finger don’t feel you need to break one in order to ice the cake- it’s a bit of a hassle)
Step One: Almond Ice the cake
You can either make your almond icing, using the recipe here if you are going From Scratch or buy plain marzipan from the shops.
450g for 7 inch
800g for 9 inch
1.25kg for 12 inch
You also need jam ( I used apricot – again either make From Scratch or buy from Supermarket) (This is only used as a glue so if you don’t have some From Scratch Jam ready made it might be worth cheating a little here)
Other utensils
thin cake boards the size of each cake
a big cake board for the bottom tier
a clean spirit level
a cake smoother
a palate knife
some icing sugar for sprinkling on surface
Method
- Sprinkle down some icing sugar to make sure the marzipan doesn’t stick to the surface and roll the marzipan into a ball
- Start to roll out ball keep turning a rolling to ensure an even circle, carry on until the marzipan is about ½ thick
- Turn your cake out onto your board. I laid mine upside down to ensure a flat surface on the top. The key here is to ensure you cake is flat. Use your spirit level to check. If your cake isn’t flat take a small piece of marzipan and roll it into a ball a place underneath the cake keep doing this with any little gaps you find until the cake is flat
- Warm some jam to loosen it up and make it easier to spread. Cover the surface of the cake with jam and carefully lay the marzipan over the cake and smooth down the sides
- Use your cake smoother to smooth down the layer, remove any excess from the bottom of the cake
- Repeat on the other 2 cakes then cover with a tea towel and leave to dry out for 2 days ( this stops the oil from the almonds discoloring the white icing
Ingredients
Fondant icing sugar
water
or
Ready made fondant icing
You also need
A ruler
Wooden cake doweling
Cake smoother
Method
- Sprinkle down some icing sugar and roll the fondant into the ball
- Roll out, turning as you go to ensure an even circle ( keep rolling until its about 5mm thick)
- Boil the kettle and pour some water into a cup to cool (you need cooled boiled water so make sure you pour it out of the kettle or like me you will be sticking a cup in the freezer – not a great plan I assure you. There is nothing more tedious than watching water cool)
- With your cooled boiled water brush the cake then carefully place your white icing over the cake. Gently smooth the icing down the side of the cake and gently smooth with your cake smoother
- Next get your doweling rods and ruler. Measure 1.5inchs in from the side of where the cake you are placing on top will sit. The push one of the dowling rods in, mark where it reaches the top of the cake. Pull out the rod and then cut 4 to the same size
- Place them in the cake in an evenly spaced square, then place one in the centre for extra support
Then you are done you have managed to create a wedding cake From Scratch, with a broken finger that is cooked, tastes pretty good and doesn’t look like the Leaning Tower of Piza.
Relief …
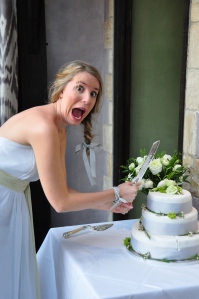
(Just in case you are wondering whether some rogue pirates got into the wedding and attacked the cake- they didn’t, but it did get cut with a ceremonial sword – cool huh!)
So my final thought. If in doubt ….let them eat cake.


